3D Modelling Exercises
3D Modelling
Name : Chan Huei Lian (0351597)
3D Modelling | Bachelor of Design in Creative Media | Taylor's University
Exercises
INSTRUCTIONS
Exercise 1 brief
Exercise 2 brief
Exercise 3 brief
LECTURES
Week 1 : Briefing
Mr Kamal briefed us about what is expected in this module and explained about his experience being in the 3D animation industry. He later showed us some works done by his studio.
Week 2 : Lecture, Tutorial
We had a tutorial session with Mr Kamal about the basics of Blender, which he taught us how to use the basic keyframes to move, rotate, scale etc. Then, he briefed us about our first exercise, which is to create a simple modelling using basic shapes/mesh. This is to be submitted along portfolio link on Times next week.
After that, Mr Kamal demonstrated how to model a knife, as our Exercise 3. This lesson is really confusing to me, as we are exposed to surface modelling for the first time. I hope that I would be able to understand it better after re-watching this tutorial's recording.
Week 3 : Lecture
We had a tutorial session with Mr. Kamal, he taught us about the edge loop, loop cut, inset, extrude and bevel used to manipulate objects. He briefed us on our Project 1 and Exercise 2. For project 1, we have to design and create hard surface modelling, such as vehicle, weapon or robots. This is to be submitted by week 7. We have to show the reference and sketches next week. As for exercise 2, we need to do modelling with cylindrical shapes, such as plates, bowl, glass etc. Make 3 objects composition.
Types of modelling :
-Polygonal Modelling
-Sculpting
-Procedural Modelling
Some key takeaways from tutorial :
Inset (I)
alt + double click to select the edges, vertices, surfaces.
select ctrl shift to select whole edges, vertices, surfaces.
Double click on edge horizontally or vertically to select the row of edges/surface etc.
Don't add object in edit mode, always switch to object mode before adding new object.
When doing bevel, do not do it with vertices on, instead it is to be done with edges.
Bevel editing can only be done once for each.
Add img reference : Add > image >img reference, enter quad view, lock rotation.
Tutorial session ss.
Polygonal Modelling (bottle) Tutorial in class
In edit mode, first, select the face on the top, then extrude, make sure it is in front view, go into quad view (ctrl + alt + Q) WITH THE FACE SELECTED, then place cursor on the front view, then ctrl alt Q again to enlarge the front view window, then scale (S), then extrude again, repeat the steps.
Class tutorial progress
Week 4 : Tutorial
We had a tutorial session with Mr. Kamal regarding Bridge tool, which joins two mesh into one. We were taught to create a cup with handle.
Tutorial session ss.
.png) |
| Tutorial session ss. |
.png) |
| First Try on knife modelling (blender) during tutorial. |
Key Tips in W4 tutorial :
Go to quad view > view > quad view option > uncheck lock rotation
To delete faces / vertices on the back of the object as well, switch to wireframe.
Alt + left click to select whole vertices / lines.
Modifier > subdivision > uncheck optimal display > apply (to make the particle smaller)
Add mesh > torus > minor radius ( to make it thinner)
Ctrl + L (to select all connected things)
Select both objects > obj > join
Alt shift Left (select edges), shift alt left to select multiple set of edges
Edge > bridge edge loop > adjust number of cuts
Select edges > press F key (to close any gap)
Ctrl 1 to make it smoother
shift to 3d cursor on top then scale bottom to flat.
Solidify > thickness > apply (top left)
select vertices or edge, click x/y/z to do symmetrical.
Knife tool : add vertices freely on object.
Mark sharp (left click with selected edges, makes edges sharper)
Boolean (modifier) : like pathfinder liddat.
Edit > Preference > add Bool tool
select 2 or more vertices > vertex menu > connect vertices path
Week 5 : Tutorial
This week's class was switched to online lecture. Mr. Kamal gave a lecture about Look Development and also about Rendering.
 |
| Lecture session ss. |
- To change object's colour individually, select obj > material properties icon on right side > scroll down > viewport display.
- For rendering, use Eevee, For more accurate render use Cycles, but will have noise grains. For amateur level, Eevee is good for fast rendering.
Week 7 : Tutorial
PROGRESSION
Week 2 : Exercise 1
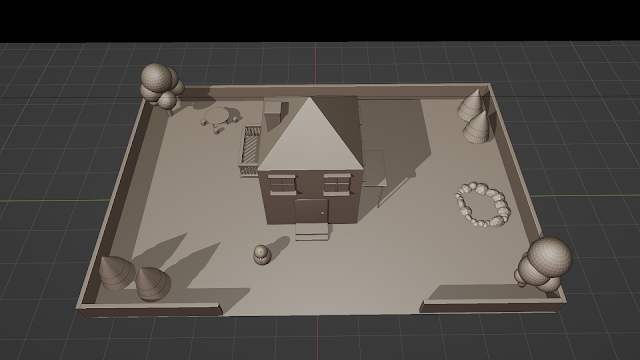
We had to create any objects we want from basic shapes in Blender. I decided to create a simple house using mostly cubes. Then, I added other objects such as trees, a snowman and a round table with cylindrical stools.
Progression 1
Exercise 2 (W3) - Polygonal Modelling From Cylindrical Shape (Bottle, Glass, Bowl etc.)
We were tasked to create 3 models of objects such as bottles, glass, bowls etc. using cylindrical shapes. The first object which is the bottle was done during Mr. Kamal's tutorial session.
.png) |
| Bottle modelling in blender |
We need to create 2 more objects ourselves for submission next week. I decided to create a cup, using extrusion and scale.
.png) |
| Cup progression 1 in blender. |
.png) |
| Cup progression 2 in blender. |
After the cup is done, I figured that a teapot would go well with the cup as a set. Hence, I found a reference picture online of a teapot and tried to model it. However, I faced a problem which I find it hard to execute the handle and the teapot's spout (mouth). It looked very bad and funny at first.
The handle looks very cacat.
The spout part looks even more cacat. It looks like elephant trunk to me. *face palms*
Mr. Kamal taught me how to fix this by using Bridge tool which joins 2 mesh together as one mesh. Fortunately, I think the final result looks better, thanks to lecturer's advice.
Viewport Image Rendering Submission
Exercise 3 (W4)
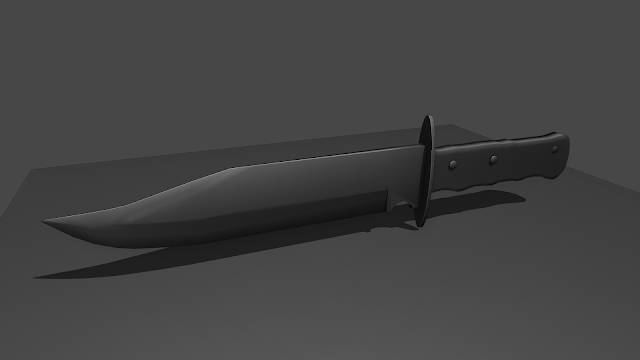
Use boolean tool to make the knife.
Knife modelling progress
.png) |
| Curve surface (extrude > move edge) |
.png) |
| Upper edges and lower edges adjusted by using move tool. |
.png) |
| Switch to wireframe mode to align center lines. |
.png)
.png) |
| Knife overall shape. |
.png) |
| Use knife tool to create sharpness at the top. |
.png) |
| Deleted the other half of the object using wireframe. |
.png) |
| Add modifier > mirror > Y to add the other half faces. |
First Try on Surface Modelling knife.
The knife surface (erm...)
Knife Modelling Viewport Rendering (Submission)
Reflection

.png)
.png)
.png)
.png)
.png)
.png)
.png)
.png)
.png)
.png)


.png)
.png)
.png)
.png)
.png)
.png)
.png)
.png)
.png)
.png)
.png)
.png)
.png)
.png)


Comments
Post a Comment